Contact Jim +44 (0)973 732140 jim@codeworks.demon.co.uk
|
|
Contact Jim +44 (0)973 732140 jim@codeworks.demon.co.uk |
|
 |
||
|
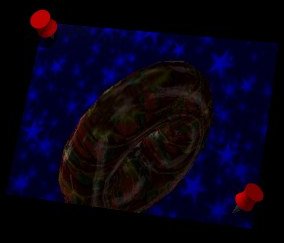
First of all what you don't see.... There are two toruses in
the scene. Objects are sorted on depth and inserted into the ot, we know that much. Ahh, you ask, but what if two objects have the same depth, who's drawn first? Answer, whatever object is added to the ordering table last. You'll probably
understand But in a nutshell
libps keeps a pointer So for this one. I added the shine object to the OT before I added the textured donut. How we get the smeary shine effect? Normals my friend, Normals. But rather than using them for backface culling as they're commonly used, we also use 'em to select the texture coordinates for the object. Don't normals take a bit to calculate, especially unit normals? That takes a square root!! Well, first off the tmd object format used by libps precalculate the normals, so thats already done. Fortunately you can rotate unit normals the same as you rotate the object they relate to, and they remain intact and correct. So I don't have to recalculate them every frame, just rotate them, which is much much quicker. The torus object has a normal for each vertex in it, and much like everything else on the playstation, they are held as a 14 bit fixed point numbers. We want to use them to select texture coordinates. Well my texture is 256 X 256 and the normals could as high as 4096. So I just shift the x and y portion of the normal right by 6 to obtain a number in the correct range, and plug it into the primitive as the texture coordinates. Behold we get something looking shiny. I also made the texture transparent to make it look more convincing. You can also use this technique to make objects look metallic or reflect their surroundings. ...and thats how it was done..... |