The following section describes a few things that you should consider when designing and creating animations to be used with the TOD files on the Yaroze.
When creating your animation you must remember that you can only use forward kinematics, that is you can only link your object together using the link feature of ‘Max’. You can not use inverse kinematics or free form deformations, although it is possible to use squash and stretch to some extend.
To create a linked model in 3D Studio Max you must connect the separate objects
using the link option. The link button is located on the long toolbar at the
top of the screen (,the button looks like this): ![]()
The create link button, will create a link between two objects. For example you may wish to create a link between a left foot object and a left leg object. To do this you would first click on the create link button. You would then move the cursor over the ‘foot’ object, at this point the cursor will change to indicate that you can select this object. Then click the left button and hold it down while you drag the cursor to the ‘left leg’ object where the cursor should again change to indicate this object is selectable, let go of the mouse button. Now when you move the leg the foot should also move.
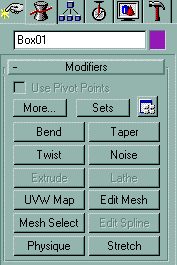
When texturing your models remember to apply a UVW mapping to any textured objects. Otherwise your texture will not appear on the model at all. To do this, select the ‘UVW map’ button from the modify menu. You may have to play with the options of this modify to get the required mapping effect as there is any number of options, such as Spherical wrap and box wrap to name a few.

If you are not sure if something is going to convert to a TOD file, a good way of testing its compatibility is to export the animation to .3DS and then immediately import the 3DS file replacing the whole scene. Then if when you play back your animation everything looks fine, it will most likely convert to TOD safely. The following describes this procedure in detail:
1. Select File from the main pull down menu, located at the top of the screen. The main pull down menu.
![]()
2. From this menu choose ‘Export’. Export

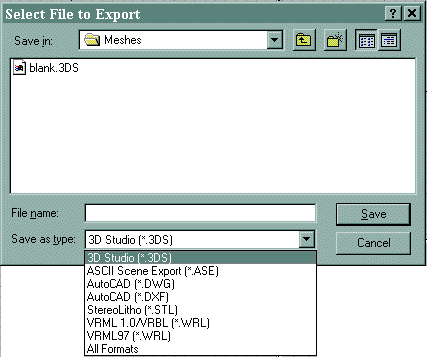
3. A dialog box is displayed that allows you to create a file name for your animation. Make sure you ‘save as type’ 3D Studio (*.3DS).

4. Now select File from the main pull down menu again. Then choose Import

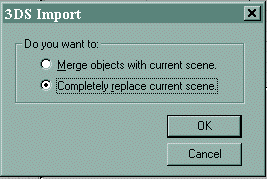
5. After selecting the file you wish to open, the following dialog box is presented. Choose to completely replace current scene.

6. Play your animation. If everything is fine then you shouldn’t have any problems converting this animation to a TOD.
It is possible to have more then one TOD file associated with a model. When using more than on TOD you must use completely different animation files making sure that the model you use is exactly the same in each. Remember this means you only have to create one TMD for all the TOD files. See example programs to find out more about using more than one TOD with a single model, as this tutorial will not explain how to do this in detail. Although this isn’t anymore difficult to achieve than using a single TOD file.